Waterslide Decals
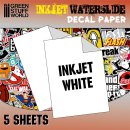
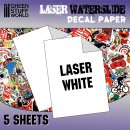
Print your own waterslide decals with this set of 5 sheets of printable decal paper. Decals are to be applied with water, no solvent required. You can also use some GSW Decal Softener and GSW Decal Fixer solutions to improve and protect the finish on uneven or rough surfaces.
Use a computer to create your artwork, because copiers and printers cannot print white, they rely on the paper itself to supply the white component in lettering and artwork. To make a decal with white lettering and/or artwork, you would start with white film decal paper.
Choose the proper type of paper according to your printer type, inkjet paper or laser paper. Remove any tissue-type sheet protector that may be present in the printable paper, and print that artwork directly onto the glossy side of the decal paper. For inkjet printing, we recommend using the "Transparency Plastic Film" (or foils) setting if your printer software supports this option. In all cases, you must immediately apply a few thin, but thorough, coats of fixative spray LINK to seal the printed image on the decal paper that will prevent ink from smearing, washing off, cracking or chipping during application.
Sheets: 5 per package
Size: 210 x 270mm (A4)
BASIC INSTRUCTIONS
1.- Cut the decal out as close as you can to the outer edge of the image. For better results, use a brand new blade in your cutter.
2.- Pick the decal up with your tweezers and let your decal soak in water for about 20 seconds. Warm water may help with this process.
3.- Use a paintbrush to gently push the decal off the sheet and onto the model. That's all folks!
ADVANCED INSTRUCTIONS
4.- Before applying it to the model, once the decal has soaked long enough, apply a bit of GSW Decal Fixer to the surface of the model where you are planning to set your decal. GSW Decal Fixer protects the paint beneath and smooths the surface, thereby helping to prevent silvering. Use a paintbrush to gently push the decal off the sheet and onto the model. If it is hard to move the decal around, adding bit more GSW Decal Fixer or water will help the decal float on the surface until it is positioned correctly.
5.- If the surface where you want to apply the flat decal is curved, like a shoulder pad, your decal could become wrinkled. To avoid this, once your decal is in place, apply GSW Decal Softener. Let the softener react and it will help remove wrinkles, as it adapts to the curved surface underneath. Repeat this step 2-3 times till wrinkles are removed.
Remove any excess with a cotton swab to remove the liquid caught between the decal and the surface. Roll the swab over the decal so it does not lift from the surface. You can also use a paper towel to press down on the decal in a rolling motion to remove the excess of liquids. By using GSW Decal Softener the relief cuts to remove wrinkles in your decal will not be needed.
6.- Finally apply GSW Decal Fixer again to the decal and the surface of the model where we have been working to unify the surface. Coat it as normal with matt or gloss varnish if you consider it necessary to remove or add a glossy finish.
- Item weight: 0,05 kg

